Madison Egleston: Powdercoating Handout
By Madison Egleston
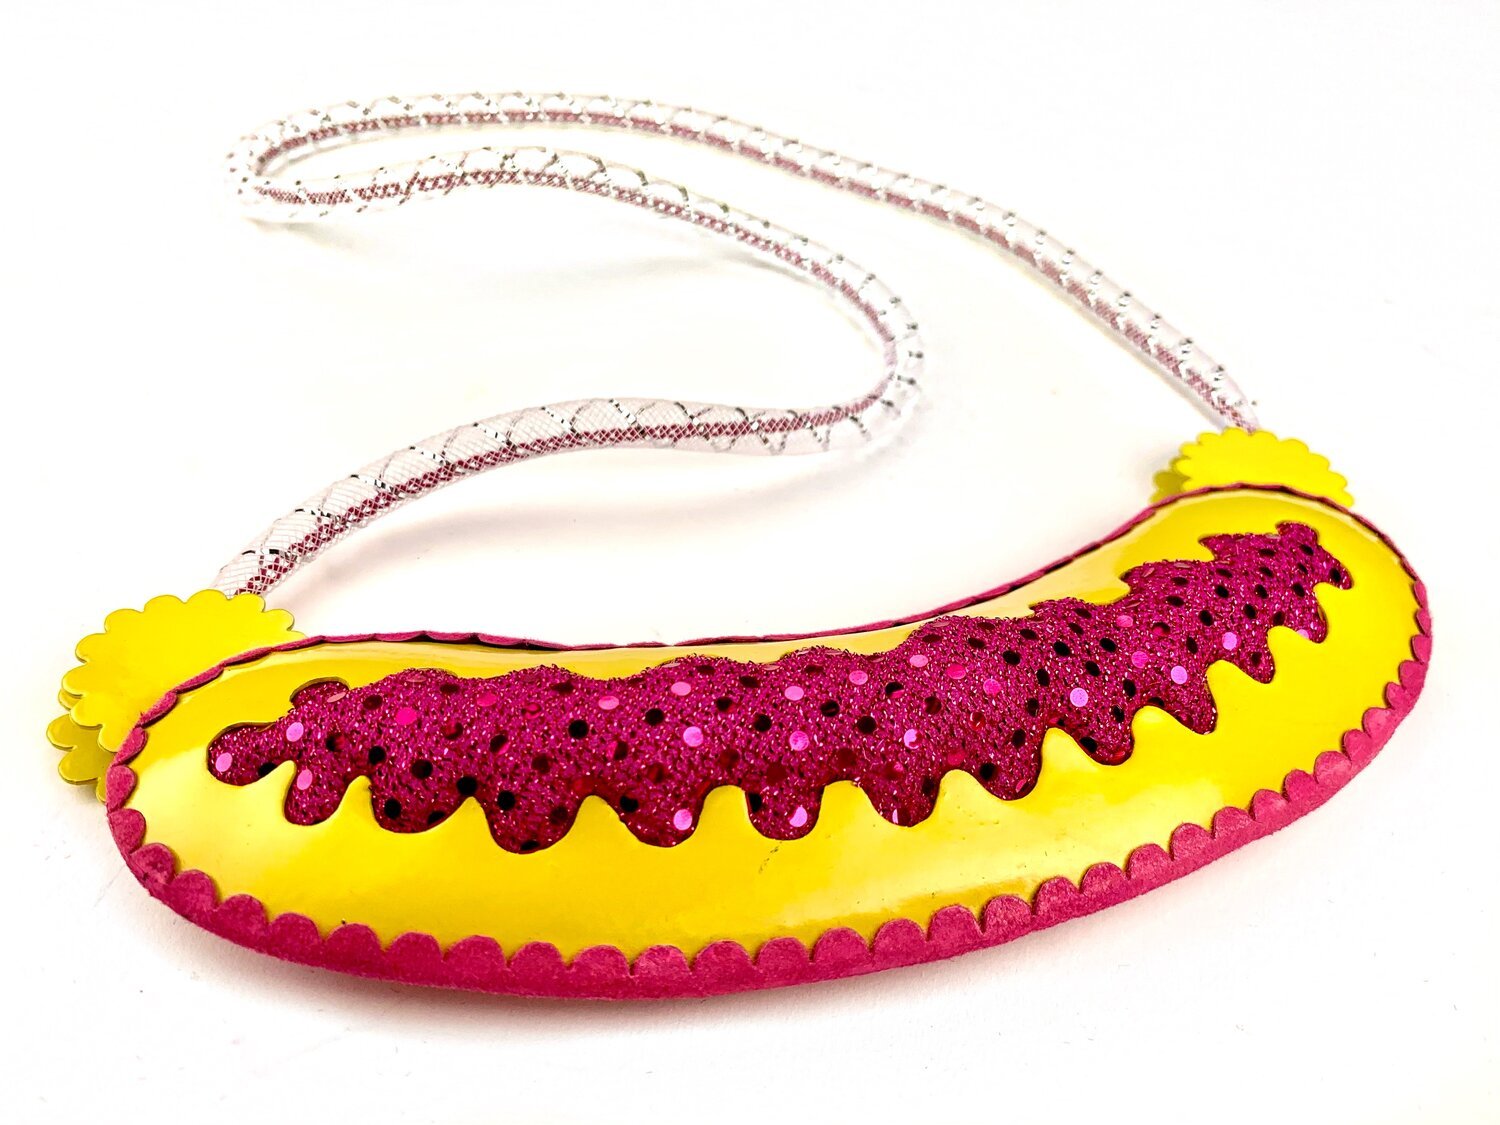
Meaty Glamour. Copper, textile, powdercoat, flocking, poly-fil. 2020. ©Madison Egleston.

Supple 7. Copper, textile, powdercoat, steel, poly-fil. 2020. ©Madison Egleston.
When I was young, I dreamed of being an artist and I loved bright colors and wanted to make big, bright, artwork. This has proven to be a longer and more involved goal than my childhood self had anticipated, and choosing to be a metalsmith left me with very few options in the *Bright Colors* department as it pertained to my childhood art-making ideologies. Unlike enameling and anodizing, powdercoating isn’t usually taught as a core part of the metalsmithing curriculum. Like many others, I learned to powdercoat as an afterthought during my senior year. It wasn’t a formal lesson, just something we learned as an option- the lesson was less than 15 minutes but it permanently changed the way that I make art.
I wasn’t immediately aware of the somewhat controversial reputation that powdercoating has in the metalsmithing community, but I quickly became aware that in the eyes of some metalsmiths, powdercoat is kitschy, industrial, lazy, and simply not a fine art process. None of this deterred me, maybe I even spitefully powdercoated more, I had finally found a process that enabled me to make the bright, colorful, work I had always dreamed of. I was enamored with the process and didn’t have a single piece of bare metal in my work for more than two years. I find myself having to defend my decision to powdercoat less as it becomes a more normalized and widely taught process. This is personally validating for selfish reasons, and also proof that an actual, thorough education on the topic dispels many of the negative preconceived notions about it.
There is one thing about powdercoating I can’t deny: It is an industrial process. This doesn’t bother me, I think we forget how many of our metalsmithing processes are co-opted from industry production because they’ve been around long enough for metalsmiths to extensively research, refine, and publish information about the best way to use them for jewelry. Powdercoating, even as an industrial process, is a baby compared to other processes like enameling and patination. It was invented in the 1940s and not introduced to the fine art community until the early 2000s, whereas techniques like enamel can be traced back as early as 1300 BC. Because of this, there is very little information about powdercoating available, and even less that’s relevant to jewelry making.
I’ve only ever seen this as an opportunity to research, test, and play with powdercoat to come up with my own solutions and methods that best serve my use of the process. I’m glad that I didn’t shy away from powdercoat, and I’m so excited to pass on and make the information I gathered accessible to all metalsmiths.

WHAT IS POWDERCOATING?
Powdercoating is the process of coating a metal piece with a thin layer of melted plastic. This is done by electrically charging small particles of powdered plastic in a spray gun, as well as the piece you want to powdercoat, the particles will stick to the electrically charged piece and then are melted on in an oven. Powdercoat can be applied to any metal of any thickness
● Brighter colors are available than other surface treatments like enamel or patination
● Powdercoat is relatively durable, you can saw, drill and rivet over powdercoat and it is somewhat bendable.
● Powdercoat is long-lasting (on a jewelry scale) it cannot be undone by burning, sanding, or chemically stripping, and takes a long time to naturally wear off
● Powdercoat is applied using electrical charge, meaning any piece you powdercoat will be fully coated one color on all sides
● You can’t “re-flow” or re-melt powdercoat like you can with enamel, unfortunately once a piece is coated it can’t be undone or adjusted
● You can add a clear matte or gloss top-coat over a piece that has already been powdercoated once, but other colors don’t usually layer that way
● The powdercoating gun must be thoroughly cleaned with air between each color application, any amount of contamination can ruin an entire batch of powdercoat
● Powdercoat, powdercoat (hopper) cups, and the powdercoat gun should NEVER be in contact with water or anything wet/oily
● Hopper Cups (which store the powdercoat) should be 1⁄4 full to avoid clogging the gun and wasting powder
● Every powdercoat has its own specific cooking instructions to ensure maximum durability and color. This handout offers the cook time/temp that I have found generally works best on most powders. It is still good practice to read the material data sheet that comes with the powder
*** Safety: Always, Always, Always work in a well-ventilated area. Wear a respirator, rubber gloves, and goggles ***
PROCESS
Preparation: The piece you want to powdercoat should be cleaned with dish soap and pumice, sanded to 320, and sandblasted to give tooth
○ The piece needs to be able to hang by a thin metal hook while it gets sprayed. There will be a contact mark where you hang the piece, choose a discreet location, and use the thinnest hook possible
○ I find it’s always worth your time to take the time to make a hook specifically for your piece and strategically use it
○ You will need a new hook every time you powdercoat, used hooks get coated in plastic and are no longer conductive
Preheat oven to 400 degrees Fahrenheit and remove an oven rack
Turn on the vent
Set air compressor to 8 PSI
Clip the charge line to the rod and put the foot pedal on the floor
○ If the rod isn’t already clean, dust it off before putting your piece on.
Hang your piece from the rod
Screw hopper cup into the gun
Turn on the charge box, now your piece, as well as the box and the spray gun are charged with electricity- DO NOT TOUCH ANYTHING IN THE BOX AFTER THIS STEP!!!
Step on the pedal (this is the final fail-safe to electrically charge your piece and protect you in case of accidental contact)
Gently pull the trigger and coat the piece
○ Keep the tip of the gun at least 2” away from the piece while you spray
○ You may need more than one coat depending on the color
○ For larger or totally flat pieces, you may need to turn the box off, take your foot off the pedal, and rotate your piece to spray the back as well
Remove your foot from the pedal and turn off the box
Remove the piece by the hook, and carefully transfer it to the oven rack.
○ If you touch your piece at all during this transfer you need to dust it off and start over
Place oven rack with your piece hanging from it into the oven, and bake for 10 min at 400º
Remove the rack from the oven and allow it to cool fully before touching
○ If you touch your piece too soon you risk burning yourself or marring the powdercoat
Unscrew the hopper cup from the spray gun, put the lid on the cup, and spray off the outside of the cup
○ If you used a communal hopper cup, clean it THOROUGHLY to avoid cross-contamination
Disconnect the charge line and dust it off with the compressed air hose
Clean the powder coating gun with the compressed air hose. Be sure to spray it down 2-3 times in all of the holes to be sure all of the residual powder is gone. Reconnect the air hose and spray to check, if no powder sprays out, it’s clean
Disconnect the air hose from the gun and leave it to the side
Clean the powdercoating box and the area around the box with a shop vac

Madison Egleston is an Artist, Metalsmith, and Plastic Enthusiest from Akron, Ohio. She grew up making art from a young age, and after high school, she continued her education at Kent State University in Kent, Ohio where she studied under Andrew Kuebeck. In 2019 she received her Bachelors of Fine Arts in Jewelry, Metals, and Enameling, and in 2020 Egleston accepted a Graduate Assistantship at Edinboro University of Pennsylvania where she currently works under Sue Amendolara and Cappy Counard. When she’s not in her studio, Madison can be found out outdoors exploring nature or playing with her cat, Yvie, and Fiancé, Andrew.
You can view more of Madison’s work here